Lite Report lietotāja rokasgrāmata
Katrs Assurement Lite ekrāns, soli pa solim, tādā secībā, kādā strādājat. Lasiet to šeit, meklējiet tajā vai lejupielādējiet to PDF formātā.
Lietotāja rokasgrāmata ir pieejama angļu un dāņu valodā.
Nodaļas
Atveriet nodaļu šeit vai lejupielādējiet to kā atsevišķu PDF.
Before you start
1.–10. lapa
Contents, index, roles, permissions and how a report moves.
Sign up and log in
11.–14. lapa
Create the company account, log in, reset your password and choose the language.
Master data
15.–17. lapa
Professions, control plans and control points from Assurement.
Company dashboard and inviting your team
21.–22. lapa
The company dashboard and how to invite users.
Create a site or project
23.–29. lapa
The site wizard, licence, participants, invitations and the site list.
Site dashboard, documents and drawings
30.–33. lapa
Upload documents and drawings, floor levels and professions for the site.
Report overview and deviations
41.–42. lapa
The report overview and following up on deviations.
Work in the field
51.–53. lapa
The field user's app: tasks, photos, drawings and Submit.
Teksta versija
Pilns rokasgrāmatas teksts, nodaļu pa nodaļai.
00Before you start
1. lapa · Assurement Lite user manual
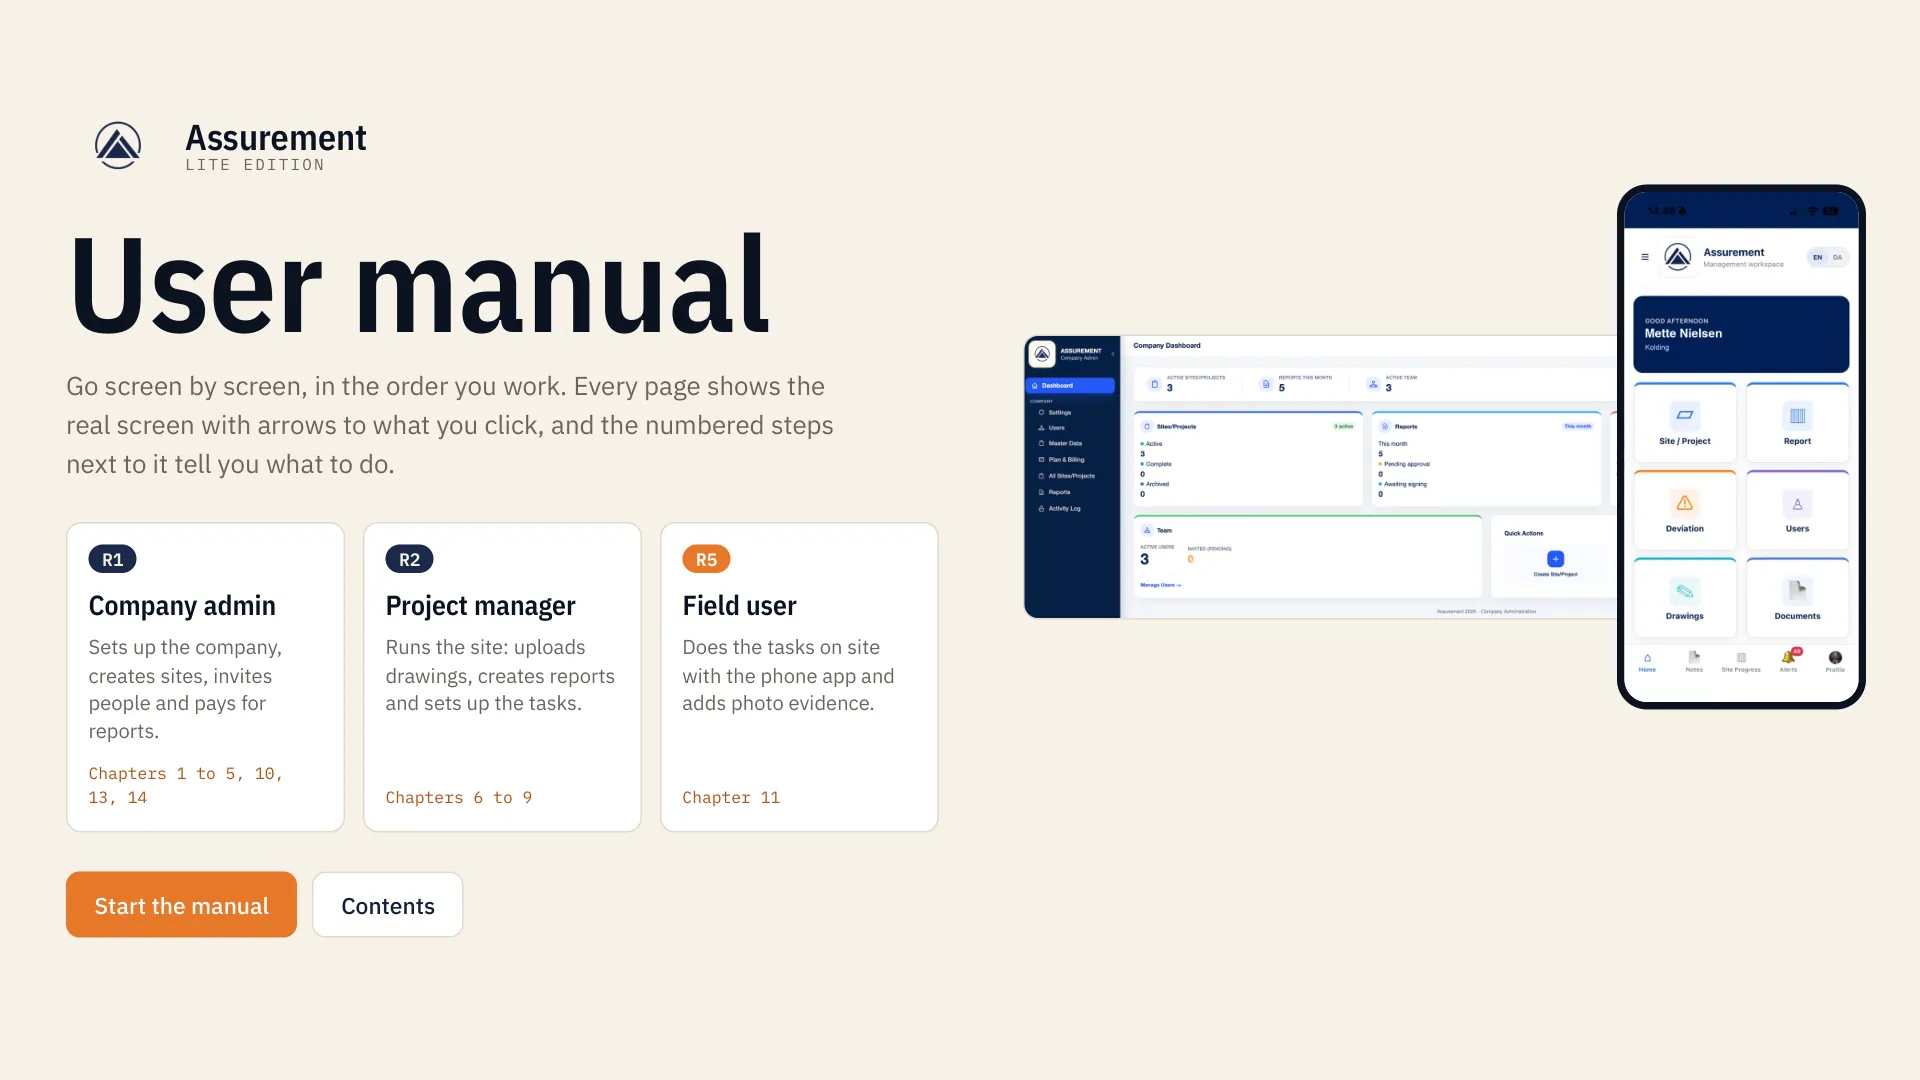
Assurement LITE EDITION User manual Go screen by screen, in the order you work. Every page shows the real screen with arrows to what you click, and the numbered steps next to it tell you what to do. R1 Company admin Sets up the company, creates sites, invites people and pays for reports. Chapters 1 to 5, 10, 13, 14 R2 Project manager Runs the site: uploads drawings, creates reports and sets up the tasks. Chapters 6 to 9 R5 Field user Does the tasks on site with the phone app and adds photo evidence. Chapter 11 Start the manual Contents
2. lapa · Contents 1/2
CONTENTS · 1 OF 2 Contents Find the task you need, then go straight to its page. The numbers on the right are page numbers; 5.1, 5.2 are the section numbers you see on each page. · Find it fast Index A to Z 4 · Before you start How to read a page 5 Who does what 6 What people can do 7 How a report moves 8 Choose your profession type 9 Setup checklist 10 01 Get started R1 Company admin 11 1.1 Create your company account 11 1.2 Log in 12 1.3 Reset your password 13 1.4 Switch to Danish 14 02 Master data R1 Company admin 15 2.1 Open Master Data 15 2.2 Find your way in Master Data 16 2.3 Profession, control plan, control point 17 03 Company settings R1 Company admin 18 3.1 Choose company access 18 3.2 Set the default profession 19 3.3 Or choose an extra profession 20 04 Company dashboard R1 Company admin 21 4.1 Know your company dashboard 21 4.2 Invite your team 22 05 Create a site or project R1 Company admin 23 5.1 Enter the site details 23 5.2 Confirm the licence 24 5.3 Add the people 25 5.4 Invite a user 26 5.5 The invitation email 27 5.6 Accept the invitation 28 5.7 Find your site 29 06 Site dashboard R2 Project manager 30 6.1 Know the site dashboard 30 6.2 Upload documents and drawings 31 6.3 Give each drawing a floor level 32 6.4 Choose the professions 33 Assurement Lite · User manual Contents 1/2 PAGE 2
3. lapa · Contents 2/2
CONTENTS · 2 OF 2 Contents 07 Create a report R2 Project manager 34 7.1 Choose module and report ID 34 7.2 Give the report a title 35 7.3 Add the report participants 36 7.4 Describe the report 37 7.5 Pick the drawings 38 7.6 Tick the task types 39 7.7 Choose the profession source 40 08 Report overview R2 Project manager 41 8.1 Know the report overview 41 8.2 Follow up on deviations 42 09 Add tasks R2 Project manager 43 9.1 Open the report tasks 43 9.2 Checklist type 1 44 9.3 Checklist type 2 45 9.4 Registration type 1 46 9.5 Registration type 2 from a control plan 47 9.6 Pick control points and building parts 48 9.7 Write your own control point 49 10 Admin app R1 Company admin 50 10.1 Use the app as admin 50 11 Work in the field R5 Field user 51 11.1 See your work 51 11.2 Start a task 52 11.3 Add photo and drawing evidence 53 12 Communication notes All Everyone with Communicate 54 12.1 Write a note 54 12.2 Read and answer 55 13 Pay for a report R1 Company admin 56 13.1 Find the invoice 56 13.2 Pay from the cart 57 13.3 Pay by card 58 13.4 View and download the invoice 59 14 Get the final report R1 Company admin 60 14.1 Preview the report 60 14.2 Download from the repository 61 14.3 The finished report 62 · Look it up Quick reference: I want to… 63 Assurement Lite · User manual Contents 2/2 PAGE 3
4. lapa · Index
LOOK IT UP Index A to Z Look up a word and go to the page number. A Account, activate 28 Account, create 11 Admin app 50 Assign task 43 B Building parts 48, 49 C Cart 57 Checklist type 1 44 Checklist type 2 45 Communication notes 54, 55 Company access 18 Company dashboard 21 Contacts 30 Control plans 17, 47 Control point, your own 49 Control points 17, 48 D Default profession 19 Deviations 42 Documents, upload 31 Download the report 61 Drawings 31, 32, 38 E Extra profession 20 F Field work 51, 52 Floor level 32 G Generate report 61 I Invitation email 27 Invite a user 22, 26, 36 Invoice 56, 59 L Language 14 Licence 24 Log in 12 M Master data 15, 16 P Password, reset 13 Payment by card 58 Permissions 7, 22 Photo evidence 53 Preview a report 60 Profession source 40 Profession type 9, 19 Professions on a site 33 R Registration type 1 46 Registration type 2 47, 48 Report, create 34 Report overview 41 Report repository 61 Report statuses 8 Roles R1, R2, R5 6 S Setup checklist 10 Sign up 11 Site, create 23 Site dashboard 30 Sites, list of 29 Submit a task 53 T Task, start 52 Task types 39, 43 U Users 22 Assurement Lite · User manual Index PAGE 4
5. lapa · How to use this manual
BEFORE YOU START How to read a page Every page is one screen of Assurement and one thing to do on it. Orange ring and arrow Where to click or type. The number matches the numbered step on the left. R1 Company admin Who The role that does this step. R1 company admin, R2 project manager, R5 field user. Where Where How to get to the screen. NEXT Next What happens after, so you always know the following screen. MOVING AROUND Use the arrow keys or the buttons at the bottom. The numbers at the top jump to a chapter. Point at a step to highlight its arrow. Who does what, the profession type and the setup checklist. NEXT Assurement Lite · User manual How to use this manual PAGE 5 1 Email 2 Sign in
6. lapa · Who does what
BEFORE YOU START · 1 OF 5 Who does what Three internal roles hand the work on to each other. People outside the company join with a named external role. R1 Company admin The first user. Creates the company, sets the profession, invites the users and creates the sites. A Single-person company: the admin is the only user and carries every role. B Company with several users: the admin invites and manages internal and external users. › R2 Project manager Runs the site. Uploads documents and drawings, creates the reports and defines the tasks for the people who carry them out. › R5 Field user Picks up the open tasks on the reports they are on, does them on site with the phone app, and adds photo and drawing evidence. When all tasks are done, the report is complete. External users Invited per site with + Invite user (page 26). Their stakeholder type tells the report in which capacity they contribute. Advisor Architect Certified structural engineer Engineer External construction manager Project manager (company user) Safety coordinator / representative Structural designer Subcontractor Subcontractor employee Sustainability coordinator Third-party control Waste responsible Others Assurement Lite · User manual Who does what PAGE 6
7. lapa · What people can do
BEFORE YOU START · 2 OF 5 What people can do Assurement uses three permissions. You set them when you invite someone (pages 22 and 26). They work the same for internal and external users. ALWAYS ON Read Everyone can view the site, the report and its documents. Read only, nothing can be changed. OPTIONAL Communicate Write in the communication notes of the report: new notes and answers (chapter 12). OPTIONAL Register Do tasks in the mobile app: start a task, register the result and add photo and drawing evidence (chapter 11). Tasks are open to everyone A task is not given to one person. When R2 clicks Assign task, every task on the report is open to everyone on it with Register. The report completes itself When all tasks are submitted in the app, the report is Ready and R1 gets the payment link. There is no review or signing step. Late tasks become deviations A task that is not done by its completion date moves to the Deviations tab automatically (page 42). Assurement Lite · User manual What people can do PAGE 7
8. lapa · How a report moves
BEFORE YOU START · 3 OF 5 How a report moves Every report passes through six statuses. You see them as counters on the site dashboard (page 30) and in the report repository. After payment Generate Report compiles everything into one PDF, however long it is. Then Download Report is enabled (page 61). Lite limits 5 running sites or projects at the same time, and 2 running reports in each site. Making room When the 2 reports of a site are paid, you can start a 3rd report in that site, or create another site. Archiving is for sites, not reports: the company admin can archive a site. 1 Draft R1 · R2 The site and report are being set up. The task plan is kept as a draft. › 2 Assign R2 The tasks are assigned: open to the field user and everyone with Register. › 3 Execution R5 Someone is working on the tasks in the mobile app. › 4 Ready R5 All tasks are submitted in the mobile app. R1 gets a notification with a payment link. › 5 Final R1 All tasks are completed and the report waits for R1 to pay. › 6 Paid R1 R1 has paid the invoice. Generate Report, then Download, on the web. Assurement Lite · User manual How a report moves PAGE 8
9. lapa · Choose your profession type
BEFORE YOU START · 4 OF 5 Choose your profession type The profession type decides which control plans and control points your company gets. Decide before you start, because the default profession is locked once it is saved. DEFAULT PROFESSION Construction companies Pick your trade from the master data library, for example Blacksmith / Metal Worker. USE GLOBAL Control plans and control points maintained in Assurement, ready to use. or USE YOUR OWN Write custom control points in the report (page 49). Master data cannot be changed. Set it up on page 19 › EXTRA PROFESSION Everyone outside construction Advisor, Realestate, Process engineers, Private or Others. You bring your own control points. The reporting flow and the roles are the same. Set it up on page 20 › Assurement Lite · User manual Choose your profession type PAGE 9
10. lapa · Setup checklist
BEFORE YOU START · 5 OF 5 Setup checklist The order that gets a new company from sign-up to its first finished report. Click a page number to go to the step. 01 R1 Create the company account and log in p. 11 › 02 R1 Choose company access: single person or company p. 18 › 03 R1 Set the default or extra profession (locked once saved) p. 19 › 04 R1 Invite your project managers (R2) and field users (R5) p. 22 › 05 New Invited users accept the invitation and get the app p. 27 › 06 R1 Create the site or project and add its participants p. 23 › 07 R1 Invite external stakeholders with the right permissions p. 26 › 08 R2 Upload the documents and drawings for the site p. 31 › 09 R2 Give each drawing a floor level p. 32 › 10 R2 Choose the professions for the site p. 33 › 11 R2 Create the report: module, ID, title, description, drawings p. 34 › 12 R2 Add the people who will do the tasks to the report p. 36 › 13 R2 Tick the task types and choose the profession source p. 39 › 14 R2 Fill in the task forms, then click Assign task to release them p. 43 › 15 R5 Do the tasks on site and add photo and drawing evidence p. 51 › 16 R1 Report Ready: pay from the notification link, then generate and download it p. 56 › Assurement Lite · User manual Setup checklist PAGE 10
01Sign up and log in
11. lapa · 1.1 Create your company account
CHAPTER 1 · GET STARTED 1.1 Create your company account R1 Company admin Login screen › Sign up The first person from your company signs up. Everyone else is invited later from inside Assurement, so they never need this form. 1 Open the Sign up tab On the login screen, click Sign up. 2 Choose the account type Private if you work alone. Business if several people in the company will use Assurement. 3 Fill in your details Full name, address, ZIP and city. A profile photo is optional. 4 Finish the form Enter your industry, then scroll down to add email, phone and password and complete the sign-up. GOOD TO KNOW The person who signs up becomes R1, the company admin. Log in with the email and password you just chose. NEXT Assurement Lite · User manual Chapter 1 · Get started PAGE 11 1 1 Sign up 2 Private or Business 3 Your details 4 Industry
12. lapa · 1.2 Log in
CHAPTER 1 · GET STARTED 1.2 Log in All Every user Login screen Use the same screen every day. Your role decides what you see after you log in. 1 Stay on the Login tab It is selected when the screen opens. 2 Enter your email The address you signed up or were invited with. 3 Enter your password Click the eye icon to show what you typed. 4 Forgot it? Click Forgot password? See page 13. 5 Click Sign in You land on your dashboard. Forgot your password? Next page. Otherwise go to chapter 2. NEXT Assurement Lite · User manual Chapter 1 · Get started PAGE 12 1 1 Login tab 2 Email 3 Password 4 Forgot password? 5 Sign in
13. lapa · 1.3 Reset your password
CHAPTER 1 · GET STARTED 1.3 Reset your password All Every user Login screen › Forgot password? Forgot your password? Ask for a reset link and choose a new one. 1 Enter your email The address you log in with. 2 Click Send reset link Open the email and follow the link to set a new password. 3 Back to sign in Return to the login screen. GOOD TO KNOW This works the same for every user, R1, R2 and R5. Prefer Danish? Next page. Otherwise go to chapter 2. NEXT Assurement Lite · User manual Chapter 1 · Get started PAGE 13 1 1 Your email 2 Send reset link 3 Back to sign in
14. lapa · 1.4 Switch to Danish
CHAPTER 1 · GET STARTED 1.4 Switch to Danish All Every user Login screen › Sprog / Language Assurement works in English and Danish. Choose the language at the top of the login screen. 1 Choose the language Sprog / Language: Dansk or English. The screens switch to the language you choose. 2 Log ind The Login tab. Tilmeld is Sign up. 3 Glemt adgangskode? Forgot password?, as on page 13. 4 Log ind The Sign in button. GOOD TO KNOW The phone app has the same EN / DA switch on its home screen (page 50). Chapter 2: look up the professions and control plans in Master Data. NEXT Assurement Lite · User manual Chapter 1 · Get started PAGE 14 1 1 Sprog 2 Log ind 3 Glemt adgangskode? 4 Log ind
02Master data
15. lapa · 2.1 Open Master Data
CHAPTER 2 · MASTER DATA 2.1 Open Master Data R1 Company admin Company menu › Master Data Master Data is the library behind every report: professions, control plans, control points, building parts and stakeholders. 1 Click Master Data It sits in the company menu on the left, under Settings and Users. GOOD TO KNOW You can read the whole library right away. Nothing here needs to be filled in before you start. The Master Data screen opens. NEXT Assurement Lite · User manual Chapter 2 · Master data PAGE 15 2 1 Master Data
16. lapa · 2.2 Find your way in Master Data
CHAPTER 2 · MASTER DATA 2.2 Find your way in Master Data R1 Company admin Company menu › Master Data Three layers and five registers. The breadcrumb always tells you which layer you are looking at. 1 Choose the layer Global (R0) is the library Assurement provides. Company (R1) and Site/Project (R2) follow below it. 2 Check the breadcrumb Global (R0) › Company (R1) › Site/Project (R2). The highlighted part is where you are. 3 Pick a register Professions, Control Plan, KP Control Points, Building Parts or Stakeholder. 4 Filter by profession Show only the plans or points of one trade. GOOD TO KNOW Master data is read only. You cannot add or change control points here. Need your own checks? Write a custom control point in the report (page 49). Read the three registers that matter most. NEXT Assurement Lite · User manual Chapter 2 · Master data PAGE 16 2 1 Choose the layer 2 You are here 3 Five registers 4 Filter
17. lapa · 2.3 Profession, control plan, control point
CHAPTER 2 · MASTER DATA 2.3 Profession, control plan, control point R1 Company admin Master Data › Professions / Control Plan / KP Control Points Three linked registers. Choose a profession and its control plans and control points come with it. 1 Profession The trade, for example PR100 Work with Soil. 12 in the global library. 2 Control plan What the trade must control, for example PR10 Work with soil. 30 in the global library. 3 Control point The single check, with acceptance criteria, control class and method, for example KP0.01. 663 in the global library. Chapter 3: set the company access and profession. NEXT Assurement Lite · User manual Chapter 2 · Master data PAGE 17 2 1 Profession 2 Control plan 3 Control point
03Company settings
18. lapa · 3.1 Choose company access
CHAPTER 3 · COMPANY SETTINGS 3.1 Choose company access R1 Company admin Company menu › Settings Decide who can sign in to your company. 1 Single person company Only company admins can sign in. Choose this if you work alone. 2 Company Each user signs in with their own role and permissions. Choose this if you have a team. Scroll down to the profession settings. NEXT Assurement Lite · User manual Chapter 3 · Company settings PAGE 18 3 1 Single person 2 Company
19. lapa · 3.2 Set the default profession
CHAPTER 3 · COMPANY SETTINGS 3.2 Set the default profession R1 Company admin Company menu › Settings › Profession For construction companies. The profession brings its control plans, control points and building parts with it. 1 Select Default Profession Use this when your trade is in the master data library. 2 Pick your profession Open the list and choose it, for example Blacksmith / Metal Worker. 3 Click Save profession Check your choice first. GOOD TO KNOW Once saved, the default profession is locked and cannot be changed. Not in construction? See the next page. Otherwise go to chapter 4. NEXT Assurement Lite · User manual Chapter 3 · Company settings PAGE 19 3 1 Default Profession 2 Pick profession 3 Save
20. lapa · 3.3 Or choose an extra profession
CHAPTER 3 · COMPANY SETTINGS 3.3 Or choose an extra profession R1 Company admin Company menu › Settings › Profession For companies outside construction, such as advisors or real estate. You then bring your own control points. 1 Select Extra Profession The category list appears. 2 Pick a category Advisor, Realestate, Process engineers, Private or Others. 3 Click Save category Your company is now set up. Chapter 4: your company dashboard. NEXT Assurement Lite · User manual Chapter 3 · Company settings PAGE 20 3 1 Extra Profession 2 Pick a category 3 Save
04Company dashboard and inviting your team
21. lapa · 4.1 Know your company dashboard
CHAPTER 4 · COMPANY DASHBOARD 4.1 Know your company dashboard R1 Company admin Dashboard Your home screen as company admin. Everything you own is one click away from here. 1 Company menu Settings, Users, Master Data, Plan & Billing, All Sites/Projects, Reports and Activity Log. 2 New Site/Project Starts the site wizard in chapter 5. It is always in the top bar. 3 Cart Shows reports waiting to be paid. See chapter 13. 4 Quick actions Create Site/Project does the same as the top button. 5 Invite User Invite your project managers (R2) and field users (R5) now, before you create a site. GOOD TO KNOW Colleagues must have an account before you can pick them as participants in step 3 of the site wizard. Invite your team first. Next page. NEXT Assurement Lite · User manual Chapter 4 · Company dashboard PAGE 21 4 1 Company menu 2 New Site/Project 3 Cart 4 Create Site/Project 5 Invite User
22. lapa · 4.2 Invite your team
CHAPTER 4 · COMPANY DASHBOARD 4.2 Invite your team R1 Company admin Company menu › Users › Invite User User Management lists everyone in the company. Invite colleagues and stakeholders from here, before you create a site. 1 Open Users In the company menu on the left. 2 Click Invite User The invite window opens. 3 Invite type Internal for colleagues such as project managers (R2) and field users (R5). External for stakeholders outside the company. 4 Stakeholder type For external users only, for example C22 Advisor. 5 Access permissions Read is always on: view only. Communicate: write in the communication notes. Register: do tasks in the mobile app. 6 First name, last name, email The invitation goes to this email. 7 Click Send Invitation The user shows as Invited until they accept. GOOD TO KNOW The invitation is valid for 24 hours. Click New Site/Project to create your first site. Chapter 5. NEXT Assurement Lite · User manual Chapter 4 · Company dashboard PAGE 22 4 1 Users 2 Invite User 3 External or Internal 4 Stakeholder type 5 Permissions 6 Name and email 7 Send Invitation
05Create a site or project
23. lapa · 5.1 Enter the site details
CHAPTER 5 · CREATE A SITE OR PROJECT 5.1 Enter the site details R1 Company admin New Site/Project › Step 1 of 3 The first of three short steps. Fields with a red star are required. 1 Site/Project Name For example Harbour Tower. 2 Start date Pick it from the calendar. 3 Code Leave it empty. Assurement generates the code. 4 Address Street, country, zip code and city. 5 Contact person Name, email and phone of the person on site. 6 Click Continue Go to step 2. Step 2: confirm the licence. NEXT Assurement Lite · User manual Chapter 5 · Create a site or project PAGE 23 5 1 Name 2 Start date 3 Leave empty 4 Address 5 Contact person 6 Continue
24. lapa · 5.2 Confirm the licence
CHAPTER 5 · CREATE A SITE OR PROJECT 5.2 Confirm the licence R1 Company admin New Site/Project › Step 2 of 3 Lite allows 5 running sites or projects at the same time. Each new site uses one of them. 1 Tick the confirmation You confirm the company holds a valid licence for this site. 2 Click Continue Go to step 3. GOOD TO KNOW Each site can have 2 reports running. When both are paid, you can start a 3rd report in that site, or create another site. Step 3: add the people. NEXT Assurement Lite · User manual Chapter 5 · Create a site or project PAGE 24 5 1 Tick 2 Continue
25. lapa · 5.3 Add the people
CHAPTER 5 · CREATE A SITE OR PROJECT 5.3 Add the people R1 Company admin New Site/Project › Step 3 of 3 Pick colleagues from your company. Their role on the site follows their account. 1 Role For example R2, the project manager. 2 Pick the person Choose from the list, for example Lars Jensen. 3 Add participant Add another row for the next person. 4 Invite user Someone not in the list yet? Invite them. See the next page. 5 Click Create Site/Project The site is created. GOOD TO KNOW You are added automatically as the creator. Add the project manager (R2) and the field users (R5) who will work on this site. Inviting someone? Next page. Otherwise skip to page 29. NEXT Assurement Lite · User manual Chapter 5 · Create a site or project PAGE 25 5 1 Role 2 Pick a person 3 Add participant 4 Invite user 5 Create
26. lapa · 5.4 Invite a user
CHAPTER 5 · CREATE A SITE OR PROJECT 5.4 Invite a user R1 Company admin Step 3 › + Invite user Invite stakeholders from outside the company, or colleagues who have no account yet. 1 Invite type External for people outside the company. Internal for colleagues. 2 Stakeholder type Their named external role, for example C22 Advisor. See the list on the Who does what page. 3 Permissions Read is always on: view only. Communicate: write in the communication notes. Register: do tasks in the mobile app. 4 First name, last name, email The invitation goes to this email. 5 Click Send Invitation The invitation goes to the email address. GOOD TO KNOW The invitation is valid for 24 hours. See what the invited person receives. NEXT Assurement Lite · User manual Chapter 5 · Create a site or project PAGE 26 5 1 External or Internal 2 Stakeholder type 3 Permissions 4 Name and email 5 Send Invitation
27. lapa · 5.5 The invitation email
CHAPTER 5 · CREATE A SITE OR PROJECT 5.5 The invitation email New Invited user The invited person's inbox This is what the invited person receives. Share this page with new users so they know what to do. 1 Who invited you The person and the company workspace you are joining. 2 Act within 24 hours The invitation expires after that. Ask for a new one if it does. 3 Scan the QR code With your phone, to open the Assurement app. 4 Download the app From Google Play or the App Store. 5 Open in Assurement Opens the invitation so you can activate your account. Fill in the Accept your invitation form. NEXT Assurement Lite · User manual Chapter 5 · Create a site or project PAGE 27 5 1 Who invited you 2 Valid 24 hours 3 Scan the QR code 4 Get the app 5 Open in Assurement
28. lapa · 5.6 Accept the invitation
CHAPTER 5 · CREATE A SITE OR PROJECT 5.6 Accept the invitation New Invited user Invitation › Accept your invitation The invited person sets a password and completes their profile to activate the account. 1 First and last name Phone is optional. 2 Password Type it twice. 3 Password requirements At least 12 characters, upper and lowercase letters, a number and a special character. 4 Education / Certification Add a description for each row. Documents are optional. Add Row adds another. 5 Experience Same as education: a description per row, documents optional. 6 Click Activate account The account is ready. Log in as on page 12. The login in the mobile app looks and works the same. Back to the company admin: find the site. NEXT Assurement Lite · User manual Chapter 5 · Create a site or project PAGE 28 5 1 Name 2 Password 3 Requirements 4 Education 5 Experience 6 Activate account
29. lapa · 5.7 Find your site
CHAPTER 5 · CREATE A SITE OR PROJECT 5.7 Find your site R1 Company admin Company menu › All Sites/Projects Every site and project of the company, with status, reports and participants. 1 Filter All, Active, Blocked, Completed or Archived. Archived sites are sites the company admin has archived. 2 Edit Change the site details. 3 View More Opens the site dashboard. This is where the project manager takes over. Chapter 6: the site dashboard. NEXT Assurement Lite · User manual Chapter 5 · Create a site or project PAGE 29 5 1 Filter by status 2 Edit 3 View More
06Site dashboard, documents and drawings
30. lapa · 6.1 Know the site dashboard
CHAPTER 6 · SITE DASHBOARD 6.1 Know the site dashboard R2 Project manager All Sites/Projects › View More One page for everything about one site: its reports, details, users and contacts. 1 Report counters How many reports are in each status. See the page How a report moves at the start of the manual. 2 Add / Invite user Add more people to this site. 3 Add Contact Keep the site contact list up to date. 4 New report Starts a report. Do this after pages 31 to 33. Upload the documents and drawings. NEXT Assurement Lite · User manual Chapter 6 · Site dashboard PAGE 30 6 1 Reports by status 2 Add / Invite user 3 Add Contact 4 New report
31. lapa · 6.2 Upload documents and drawings
CHAPTER 6 · SITE DASHBOARD 6.2 Upload documents and drawings R2 Project manager Site dashboard › 4. Document upload / 5. Drawings upload Upload once, and every report on this site can use the files. 1 Upload document Inspection reports, colour codes, building part lists. 2 Upload drawing Plans and sections for the site. 3 Check the preview Each file shows as a card. Delete removes it. GOOD TO KNOW Upload drawings here first. The report wizard picks its drawings from this list. Give each drawing a floor level. NEXT Assurement Lite · User manual Chapter 6 · Site dashboard PAGE 31 6 1 Upload document 2 Upload drawing 3 Preview
32. lapa · 6.3 Give each drawing a floor level
CHAPTER 6 · SITE DASHBOARD 6.3 Give each drawing a floor level R2 Project manager Site › Drawings Drawings are grouped by floor level. Every drawing must be assigned to a floor level. 1 Upload drawing Add a new drawing to the site. 2 Level Shows -- until the drawing has a floor level. 3 View Open the drawing. Remove deletes it. 4 Click Assign level Choose the floor level the drawing belongs to. Choose the professions for the site. NEXT Assurement Lite · User manual Chapter 6 · Site dashboard PAGE 32 6 1 Upload drawing 2 No level yet 3 View 4 Assign level
33. lapa · 6.4 Choose the professions
CHAPTER 6 · SITE DASHBOARD 6.4 Choose the professions R2 Project manager Site dashboard › 6. Profession selection The company default profession is already selected. Add more if other trades work on the site. 1 Profession source Default Profession or Extra Profession, as set in Company settings. 2 Tick more professions The default stays selected. 3 Click Save professions Discard undoes your changes. 4 Check what is loaded For example 3 plans, 1 building part and 37 control points. 5 Latest reports Search the reports of this site. Scroll up and click New report. Chapter 7. NEXT Assurement Lite · User manual Chapter 6 · Site dashboard PAGE 33 6 1 Profession source 2 Tick more 3 Save 4 What is loaded 5 Search reports
07Create a report
34. lapa · 7.1 Choose module and report ID
CHAPTER 7 · CREATE A REPORT 7.1 Choose module and report ID R2 Project manager Site dashboard › New report › Step 1 of 6 A guided wizard in six steps. The dots at the top show where you are. A site can have 2 reports running at the same time. 1 Choose module Select Lite Report. 2 Report ID Type an ID that is unique in your company. 3 Click Continue Go to step 2. Step 2: the title. NEXT Assurement Lite · User manual Chapter 7 · Create a report PAGE 34 7 1 Lite Report 2 Report ID 3 Continue
35. lapa · 7.2 Give the report a title
CHAPTER 7 · CREATE A REPORT 7.2 Give the report a title R2 Project manager New report › Step 2 of 6 The title is what the team sees in lists and on the phone. 1 Report ID It follows along at the top of every step. 2 Report title For example Functional test, basement. 3 Click Continue Go to step 3. Step 3: add the people to the report. NEXT Assurement Lite · User manual Chapter 7 · Create a report PAGE 35 7 1 Your report ID 2 Title 3 Continue
36. lapa · 7.3 Add the report participants
CHAPTER 7 · CREATE A REPORT 7.3 Add the report participants R2 Project manager New report › Step 3 of 6 Choose who works on this report. Tasks are open to everyone on the report with the Register permission, so add all the people who may carry them out. 1 Invite type Internal for colleagues. External for stakeholders. 2 Add an existing participant Pick a colleague who already has an account. 3 Or invite a new user: role For example R2 Project Manager, or the field user role. 4 Email Where the invitation goes. 5 Click Send Invite Valid for 24 hours. The new user follows pages 27 and 28. 6 Report participants Everyone on the report. You are listed as a predefined participant. 7 Click Continue Go to step 4. Step 4: the description. NEXT Assurement Lite · User manual Chapter 7 · Create a report PAGE 36 7 1 Internal 2 Existing user 3 Role 4 Email 5 Send Invite 6 Participants 7 Continue
37. lapa · 7.4 Describe the report
CHAPTER 7 · CREATE A REPORT 7.4 Describe the report R2 Project manager New report › Step 4 of 6 Tell the field team what the report covers before they start. 1 Report description What is checked, where, and why. 2 Watch the word count Up to 1000 words. 3 Click Continue Go to step 5. Step 5: pick the drawings. NEXT Assurement Lite · User manual Chapter 7 · Create a report PAGE 37 7 1 Description 2 Word count 3 Continue
38. lapa · 7.5 Pick the drawings
CHAPTER 7 · CREATE A REPORT 7.5 Pick the drawings R2 Project manager New report › Step 5 of 6 Choose from the drawings you uploaded on the site dashboard. 1 Tick one or more drawings For example A.01.3 Koter. 2 Missing one? Click + Add drawing, then Refresh. 3 Click Continue Go to the last step. Step 6: choose the tasks. NEXT Assurement Lite · User manual Chapter 7 · Create a report PAGE 38 7 1 Tick 2 Add drawing 3 Continue
39. lapa · 7.6 Tick the task types
CHAPTER 7 · CREATE A REPORT 7.6 Tick the task types R2 Project manager New report › Step 6 of 6 Tick the kinds of task this report needs. Each one becomes work for the field user. 1 Tick the task types Checklist type 1 or 2, Registration type 1 or 2. All are optional. 2 Create Report Click it after you have chosen the profession source on the next page. Choose where the control points come from. NEXT Assurement Lite · User manual Chapter 7 · Create a report PAGE 39 7 1 Tick task types 2 Create Report
40. lapa · 7.7 Choose the profession source
CHAPTER 7 · CREATE A REPORT 7.7 Choose the profession source R2 Project manager New report › Step 6 of 6 As soon as you tick a task type, Assurement asks where the control points should come from. 1 Ticked task types The source question appears below them. 2 Choose the source Global: the master data library from Assurement. Company: your company's control points. Extra: your extra profession. You can always add custom control points later (page 49). GOOD TO KNOW Then scroll down and click Create Report. Chapter 8: the report overview. NEXT Assurement Lite · User manual Chapter 7 · Create a report PAGE 40 7 1 Ticked types 2 Source
08Report overview and deviations
41. lapa · 8.1 Know the report overview
CHAPTER 8 · REPORT OVERVIEW 8.1 Know the report overview R2 Project manager Report Overview The home of one report. Every area of the report opens from here. 1 Status Pending, In Progress, Completed and the total number of tasks. 2 Tasks Add and follow the tasks. Chapter 9. 3 Deviations Tasks that ran past their completion date, or were marked deviated in the app. 4 Communication Notes Talk with the team about this report. Chapter 12. 5 Back Return to the site. GOOD TO KNOW Participants, Contacts, Documents, Drawings, Reports and Activity Log are one click away too. Open Deviations. Next page. NEXT Assurement Lite · User manual Chapter 8 · Report overview PAGE 41 8 1 Status 2 Tasks 3 Deviations 4 Communication Notes 5 Back
42. lapa · 8.2 Follow up on deviations
CHAPTER 8 · REPORT OVERVIEW 8.2 Follow up on deviations R2 Project manager Report Overview › Deviations Everything that did not go as planned, in one place. You do not need to move anything here yourself. 1 Task deviations A task that is not done by its completion date has a time deviation and moves here automatically. Deviations raised in the mobile app are listed here too. 2 MOBILE The deviation was raised from the mobile app. 3 Type and date For example automatic overdue, with the date and the original due date. 4 View Open the task to see what happened. 5 Overdue tasks Tasks whose completion date has passed, with the report and the date. 6 Back Return to the report overview. Chapter 9: add the tasks. NEXT Assurement Lite · User manual Chapter 8 · Report overview PAGE 42 8 1 Task deviations 2 From the app 3 Type 4 View 5 Overdue tasks 6 Back
09Add tasks
43. lapa · 9.1 Open the report tasks
CHAPTER 9 · ADD TASKS 9.1 Open the report tasks R2 Project manager Report Overview › Tasks Every task type you ticked in the report wizard is listed here. Each one has its own form, and Assign task releases the work to the field. 1 Access as Shows the role you are working as, here R2 (Project Manager). 2 Task types The types chosen for this report. Each opens its form on the next pages. 3 Task count How many tasks of each type exist. 0 tasks means the form is still empty. 4 Report Preview See how the report will look. 5 Assign task Releases the tasks to the field. Tasks are not given to one person: they are open to everyone on the report with the Register permission. Fill in the task forms first. 6 Back Return to the report overview. Fill in each task form. Next: Checklist type 1. NEXT Assurement Lite · User manual Chapter 9 · Add tasks PAGE 43 9 1 Access as R2 2 Task type 3 Task count 4 Report Preview 5 Assign task 6 Back
44. lapa · 9.2 Checklist type 1
CHAPTER 9 · ADD TASKS 9.2 Checklist type 1 R2 Project manager Report tasks › Checklist type 1 The simple checklist needs a title, a date and a description. 1 Title What the checklist is about. 2 Completion date When the task must be done. 3 Checklist description What the field user must check. 4 Add task Add another task to the same checklist. 5 Click Create task Back to report tasks takes you to the list. Checklist type 2. NEXT Assurement Lite · User manual Chapter 9 · Add tasks PAGE 44 9 1 Title 2 Completion date 3 Description 4 Add task 5 Create task
45. lapa · 9.3 Checklist type 2
CHAPTER 9 · ADD TASKS 9.3 Checklist type 2 R2 Project manager Report tasks › Checklist type 2 The structured checklist, with room, scope, time and what counts as accepted. 1 Title What the checklist is about. 2 Completion date The control ID and date are filled in for you. 3 Description What to check. 4 Room, scope and time Where, how much in percent, and at what time. 5 Accept The acceptance criteria the work must meet. 6 Click Create task Or Add task first for another one. Registration type 1. NEXT Assurement Lite · User manual Chapter 9 · Add tasks PAGE 45 9 1 Title 2 Completion date 3 Description 4 Room, scope, time 5 Accept 6 Create task
46. lapa · 9.4 Registration type 1
CHAPTER 9 · ADD TASKS 9.4 Registration type 1 R2 Project manager Report tasks › Registration type 1 The quickest way to register something on site. 1 Title A short name for the registration. 2 Completion date When it must be done. 3 Control ID Filled in for you. 4 Subject/description What happened or what must be registered. 5 Click Create task Add task first if you need more. Registration type 2, from a control plan. NEXT Assurement Lite · User manual Chapter 9 · Add tasks PAGE 46 9 1 Title 2 Completion date 3 Control ID 4 Subject 5 Create task
47. lapa · 9.5 Registration type 2 from a control plan
CHAPTER 9 · ADD TASKS 9.5 Registration type 2 from a control plan R2 Project manager Report tasks › Registration type 2 Build tasks straight from the control plans of the site's profession. 1 Task source Global control point uses the library. Custom control point is on page 49. Extra profession control point is for extra professions. 2 Title A name for this set of tasks. 3 Selected profession Shown for you, for example Work with Soil. 4 Completion date When the tasks must be done. 5 Pick a control plan For example PR10. Its control points load below. Pick the control points. NEXT Assurement Lite · User manual Chapter 9 · Add tasks PAGE 47 9 1 Global control point 2 Title 3 Profession 4 Completion date 5 Pick a plan
48. lapa · 9.6 Pick control points and building parts
CHAPTER 9 · ADD TASKS 9.6 Pick control points and building parts R2 Project manager Registration type 2 › Control points Each ticked control point becomes one task for the field user. 1 Tick the control points Each shows its number, label, control type, activity and time window. 2 Tick building parts At least one and at most two. 3 Click Save Changes The tasks are created. Need a check that is not in the library? Next page. NEXT Assurement Lite · User manual Chapter 9 · Add tasks PAGE 48 9 1 Tick points 2 Building part 3 Save Changes
49. lapa · 9.7 Write your own control point
CHAPTER 9 · ADD TASKS 9.7 Write your own control point R2 Project manager Registration type 2 › Custom control point Not using the control plans and control points from Assurement? Write your own custom control point here, in the report. Master data itself cannot be changed. 1 Control Plan Name The plan this check belongs to. 2 Control Type and number For example Process and KP08.15. 3 Activity What must be controlled, up to 300 characters. 4 Building parts At least one and at most two. 5 Click Add control point It joins the task selection right away. GOOD TO KNOW When all task forms are filled in, go back to the report tasks (page 43) and click Assign task. The tasks are then open, in the mobile app, to everyone on the report with the Register permission. Chapter 10: the app for the admin. NEXT Assurement Lite · User manual Chapter 9 · Add tasks PAGE 49 9 1 Plan name 2 Type and number 3 Activity 4 Building part 5 Add control point
10Admin app
50. lapa · 10.1 Use the app as admin
CHAPTER 10 · ADMIN APP 10.1 Use the app as admin R1 Company admin Assurement app › Home The admin workspace on your phone. Follow every site from anywhere. 1 Six areas Site / Project, Report, Deviation, Users, Drawings and Documents. 2 Language Switch between English and Danish. 3 Site Progress Opens the progress screen. 4 Change site Tap to pick another site. 5 Progress Percent done, with completed, pending and deviated items. Chapter 11: the field user does the work. NEXT Assurement Lite · User manual Chapter 10 · Admin app PAGE 50 10 1 Six areas 2 EN / DA 3 Site Progress 4 Change site 5 Progress
11Work in the field
51. lapa · 11.1 See your work
CHAPTER 11 · WORK IN THE FIELD 11.1 See your work R5 Field user Assurement app › Report Dashboard The field user sees the reports they are on. Every task on a report is open to everyone on it with the Register permission. 1 Task completion How far the report is, in percent. 2 Totals Total, pending, deviated and completed tasks, and drawings. 3 Tasks Tap to see your task list. 4 Task status Completed, Pending, In Progress and Deviated. 5 Continue a task The task you are working on is at the top. Start a task. NEXT Assurement Lite · User manual Chapter 11 · Work in the field PAGE 51 11 1 Completion 2 Totals 3 Tasks 4 Task status 5 Continue task
52. lapa · 11.2 Start a task
CHAPTER 11 · WORK IN THE FIELD 11.2 Start a task R5 Field user Report Dashboard › Tasks Open the task to read what must be checked, then start it. 1 Status Assigned, In Progress or Completed. 2 Start task Or Open task to read it first. 3 Read the details Completion date, control plan, control type, control point and activity. 4 Building part Where on the building the check belongs. Add photos and marks. NEXT Assurement Lite · User manual Chapter 11 · Work in the field PAGE 52 11 1 Status 2 Start task 3 What to check 4 Building part
53. lapa · 11.3 Add photo and drawing evidence
CHAPTER 11 · WORK IN THE FIELD 11.3 Add photo and drawing evidence R5 Field user Task › Mark image / Mark drawing Photos are stamped with date, time and GPS. Draw on them to show what you found. 1 Date and GPS Added to every photo automatically. 2 Pencil Pick a colour and draw. Eraser removes marks. 3 Save image The photo is stored with the task. 4 Mark the drawing Circle the spot where you did the check. 5 Save drawing The marked drawing is stored with the task. 6 Tap Submit At the end of the task. The task is then completed. Not shown on the screens above. GOOD TO KNOW When all tasks are submitted, the report is Ready. There is no review or signing step. The company admin gets a notification with a payment link (chapter 13). Chapter 12: talk with the team. NEXT Assurement Lite · User manual Chapter 11 · Work in the field PAGE 53 11 1 Date and GPS 2 Pencil 3 Save image 4 Your mark 5 Save drawing
12Communication notes
54. lapa · 12.1 Write a note
CHAPTER 12 · COMMUNICATION NOTES 12.1 Write a note All Everyone with Communicate Report › Communication Notes, or Notes in the app Every report has one conversation. Everyone on the report can read it. Only users with the Communicate permission can write. 1 New general note Tap to open the form. 2 Title What the note is about. 3 Category Tap to open the list. 4 Pick a category Reminder, Formal notice, Urgent, Confirmation, Action required, Agreement or Causes delay. 5 Write the message To the team of the report. 6 Add attachment Images, PDF, Word or CSV. Optional. 7 Send note The team receives it. Read and answer notes. NEXT Assurement Lite · User manual Chapter 12 · Communication notes PAGE 54 12 1 New note 2 Title 3 Category 5 Message 6 Attachment 7 Send note 4 Pick one
55. lapa · 12.2 Read and answer
CHAPTER 12 · COMMUNICATION NOTES 12.2 Read and answer All Everyone with Communicate Communication Notes › Team communication Questions and answers stay with the report as part of its record. 1 Filter All, Sent, Received or Drafts. 2 Search By subject or text. 3 Category Shows the tone before you read. 4 Attachment Tap to open it. 5 The answer Replies appear on top, with sender, role and date. Chapter 13: pay for the report. NEXT Assurement Lite · User manual Chapter 12 · Communication notes PAGE 55 12 1 Filter 2 Search 3 Category 4 Attachment 5 The answer
13Pay for a report
56. lapa · 13.1 Find the invoice
CHAPTER 13 · PAY FOR A REPORT 13.1 Find the invoice R1 Company admin Notification › payment link, or Company menu › Plan & Billing When all tasks of a report are submitted, the report is Ready and the company admin gets a notification with a payment link. The link opens the invoice here, on the web. One invoice per report, 149 DKK plus VAT. 1 Search By site or project name, or filter by issued date. 2 Status Unpaid, Paid or Written Off. 3 Add to Cart For an unpaid invoice. View opens the invoice. 4 Cart The badge shows how many are waiting. Open the cart and pay. NEXT Assurement Lite · User manual Chapter 13 · Pay for a report PAGE 56 13 1 Search 2 Status 3 Add to Cart 4 Cart
57. lapa · 13.2 Pay from the cart
CHAPTER 13 · PAY FOR A REPORT 13.2 Pay from the cart R1 Company admin Top bar › Cart Pay one or more reports together. 1 Hover the cart The billing cart shows what is in it. 2 Click the cart The invoice cart opens. 3 Select the reports Tick the ones to pay. The bin removes one. 4 Check the total Subtotal, 25% VAT and total. 149 DKK becomes 186.25 DKK. 5 Click Checkout & Pay The card payment page opens. Pay by card. NEXT Assurement Lite · User manual Chapter 13 · Pay for a report PAGE 57 13 1 Cart 2 Open checkout 3 Select 4 Total 5 Checkout & Pay
58. lapa · 13.3 Pay by card
CHAPTER 13 · PAY FOR A REPORT 13.3 Pay by card R1 Company admin Invoice Cart › Checkout & Pay A secure card payment page from Flatpay. It is in Danish, and the amount includes VAT. 1 I alt The total to pay, 186,25 DKK for one report. Vis detaljer shows the details. 2 Kortnummer Your card number. Visa, Visa Electron, Mastercard and Maestro are accepted. 3 Udløbsdato Expiry date, MM / ÅÅ. 4 Kontrolcifre The 3 digit security code on the back of the card. 5 Click Betal Pay. The report status changes to Paid, and Generate Report becomes available (page 61). 6 Afbryd Cancel and go back without paying. Need the invoice itself? Next page. NEXT Assurement Lite · User manual Chapter 13 · Pay for a report PAGE 58 13 1 I alt 2 Kortnummer 3 Udløbsdato 4 Kontrolcifre 5 Betal 6 Afbryd
59. lapa · 13.4 View and download the invoice
CHAPTER 13 · PAY FOR A REPORT 13.4 View and download the invoice R1 Company admin Plan & Billing › View Every invoice can be printed or downloaded as PDF. 1 Payment due An unpaid invoice has Add to Cart right next to the notice. 2 Print or download Print, or Download Invoice PDF next to it. 3 Total due 149.00 DKK, VAT 37.25 DKK, total 186.25 DKK. 4 Back to Billing Return to the invoice list. Chapter 14: get the final report. NEXT Assurement Lite · User manual Chapter 13 · Pay for a report PAGE 59 13 1 Add to Cart 2 Print or PDF 3 Total due 4 Back to Billing
14Get the final report
60. lapa · 14.1 Preview the report
CHAPTER 14 · GET THE FINAL REPORT 14.1 Preview the report R1 Company admin Reports › Preview Check the report for free at any time. Names and contact details stay hidden until the report is paid. 1 The notice Names and contact details are hidden until payment. 2 Masked values Shown as stars, for example met****. 3 Close preview Back to the list. GOOD TO KNOW After payment, generate the report in the repository (next page). The full report is then available. Download from the report repository. NEXT Assurement Lite · User manual Chapter 14 · Get the final report PAGE 60 14 1 Hidden until paid 2 Masked 3 Close preview
61. lapa · 14.2 Download from the repository
CHAPTER 14 · GET THE FINAL REPORT 14.2 Download from the repository R1 Company admin Company menu › Reports Every report and every version in one library. Generate Report is available on the web only, after the report is paid. 1 Filter By status, site, report name, date or version, then click Apply Filters. 2 Preview Available for every report. 3 Generate Report After payment. The report is compiled into one PDF, however long it is. Generating again creates a new version, v1, v2 and so on. 4 Download Report Enabled once the PDF is generated. See what the finished report contains. NEXT Assurement Lite · User manual Chapter 14 · Get the final report PAGE 61 14 1 Apply Filters 2 Preview 3 Generate 4 Download
62. lapa · 14.3 The finished report
CHAPTER 14 · GET THE FINAL REPORT 14.3 The finished report R1 Company admin Reports › Download Report Everything registered in the field is bound into the Lite report template and compiled into one PDF, with names and contact details shown. 1 Project information Site, address, contractor, sender and recipient. 2 Participants Everyone on the report, with role and email. 3 Approved The result of each task. 4 Task results One section per task type: checklists and registrations with their details. GOOD TO KNOW Share the PDF with your client or keep it for your records. Every version stays in the report repository. You have been through the whole flow. See the quick reference. NEXT Assurement Lite · User manual Chapter 14 · Get the final report PAGE 62 14 1 Project information 2 Participants 3 Approved 4 Task results
15Quick reference
63. lapa · Quick reference
QUICK REFERENCE I want to… TASK WHO WHERE PAGE Create the company account R1 Company admin Login screen › Sign up 11 1.1 Reset a forgotten password All Every user Login screen › Forgot password? 13 1.3 Set the company profession R1 Company admin Company menu › Settings 19 3.2 Invite a colleague R1 Company admin Company menu › Users › Invite User 22 4.2 Create a site or project R1 Company admin Top bar › New Site/Project 23 5.1 Invite a user or stakeholder R1 Company admin Step 3 › + Invite user 26 5.4 Upload drawings for a site R2 Project manager Site dashboard › Upload drawing 31 6.2 Create a report R2 Project manager Site dashboard › New report 34 7.1 Add people to a report R2 Project manager New report › Step 3 36 7.3 Add tasks to a report R2 Project manager Report Overview › Tasks 43 9.1 Follow up on deviations R2 Project manager Report Overview › Deviations 42 8.2 Do a task in the field R5 Field user App › Report Dashboard › Tasks 52 11.2 Write a communication note All Everyone with Communicate Report › Communication Notes 54 12.1 Pay for a report R1 Company admin Notification › payment link 56 13.1 Generate and download the report R1 Company admin Company menu › Reports 61 14.2 Need help? Click the blue Support button at the bottom right of any screen, in the web app and in the phone app. KS Assurement ApS Dalumvej 45 · 5250 Odense SV info@assurement.dk +45 31 41 81 38 · +45 40 10 57 20 assurement.dk Assurement Lite · User manual Quick reference PAGE 63
Joprojām nepieciešama palīdzība?
Zvaniet mums pa tālruni +45 31 41 81 38 no pirmdienas līdz piektdienai 8:00–16:00 vai piesakiet bezmaksas 30 minūšu demo, un mēs visu jums parādīsim.